How I edit your pictures can vary depending on your preferences and budget. My aim has always been to produce stunning photographs that replicate the colours and detail that our eyes see. This is rarely straightforward, especially since the initial RAW files from the camera start out flat and lifeless with a yellow cast. This is where a sprinkle of magic from a skilled photographer can bring your images to life!
Editing styles can vary hugely between different photographers, this will define their style, and their interpretation of colour. The trend amongst many UK photographers is for toned down dreamy colours, rather than the more natural and colourful results that you see in my portfolio. But I’m aware that everyone has different expectations when it comes to quality and vibrancy, as well as budget! Professional cameras capture every little detail on the RAW files, it’s just not always visible to our eyes initially. Then it takes a state of the art AI setup and/or highly skilled operator to nurture the finer details at the editing stage. All the JPEG’s I supply on either option are print ready. So to give you a little more choice around editing styles and pricing, there are two main options which I describe below.
Nothing changes in the way I take my pictures, it’s just how I edit the RAW files, which I’ve called Standard Editing and Advanced Editing. All the pictures that you see on my website are edited to an Advanced standard.
STANDARD EDITING
The quality with this approach is good. This is how the vast majority of professional photographers release their work. I still go through all of your pictures to remove images with blinks or bad expressions. Then all of your photographs are colour and contrast adjusted using the very latest AI auto-correct software. Without AI technology, to get to this standard just a few years ago would have required about ten hours of skilled manual computer work for an all day wedding! The AI software replicates my advanced editing style to the best of its ability. Compared to my advanced edit, the accuracy is about 90% for overall colours and contrast. But where it doesn’t perform so perfectly is adding detail into localised highlight and shadow areas (dodging and burning), or doing any photoshop modifications like reducing facial skin reflections and shine.
This approach is a great way to keep the initial costs as sensible as possible. Then you have the option to select individual images for advanced editing at a later date if required. Optional: I charge £5 per image for individual advanced image edits after the day.
ADVANCED EDITING
The difference is really noticeable with my advanced handcrafted editing techniques used on every individual image, especially if printing at larger sizes. We’re now talking about images that have improved clarity and detail throughout. Most significantly the highlight and shadow definition is superior – you will see the detail such as lace patterns on the bride’s white dress on bright days, lots more details in your floral arrangements and guests’ faces under their hat brims. Backgrounds in darker church or venue interiors will be so much clearer too. Most images have uneven highlight to shadow areas, this manual editing style evens out these imperfections.
Colours and contrasts will be improved throughout, uprights will also be corrected, crops are spot on etc. I’ll brighten the backdrops to boost the final results on dark grey days, or darken the backdrops if it’s a very bright sunny day. On sunny days or for images taken with flash lighting, faces can pick up many reflections, the most noticeable of these will be improved on close-up shots. Ultimately all the images still look very natural, I’m just fine tuning each one individually to replicate what our eyes see.
On a typical all day wedding I will spend about 20 hours on these advanced manual edits. It is very rare to see wedding photographers working with this more detailed editing approach on every wedding image. Minor Photoshopping is included on this option at my discretion.
OPTIONAL: FINE ART EDITING / ADVANCED PHOTOSHOPPING
This may be a consideration if you want to make big enlargements from the JPEGs I supply. I now obsess about the quality on any given image! I’m now doing extensive Photoshop work where necessary for skin improvements, opening eyes, head swaps, exit sign removal, teeth whitening, removing objects or people etc. £10- £30 per image.
MUTED OR VIBRANT COLOURS
I’ll also ask if you prefer your edited images to be more vibrant in colour or slightly more muted. By far the most popular request is for vibrant images that accurately replicate what our eyes see. All the images in my brochure and on my website are edited with this approach.
I recommend you view these images on a large screen
Standard Edit
Advanced Edit
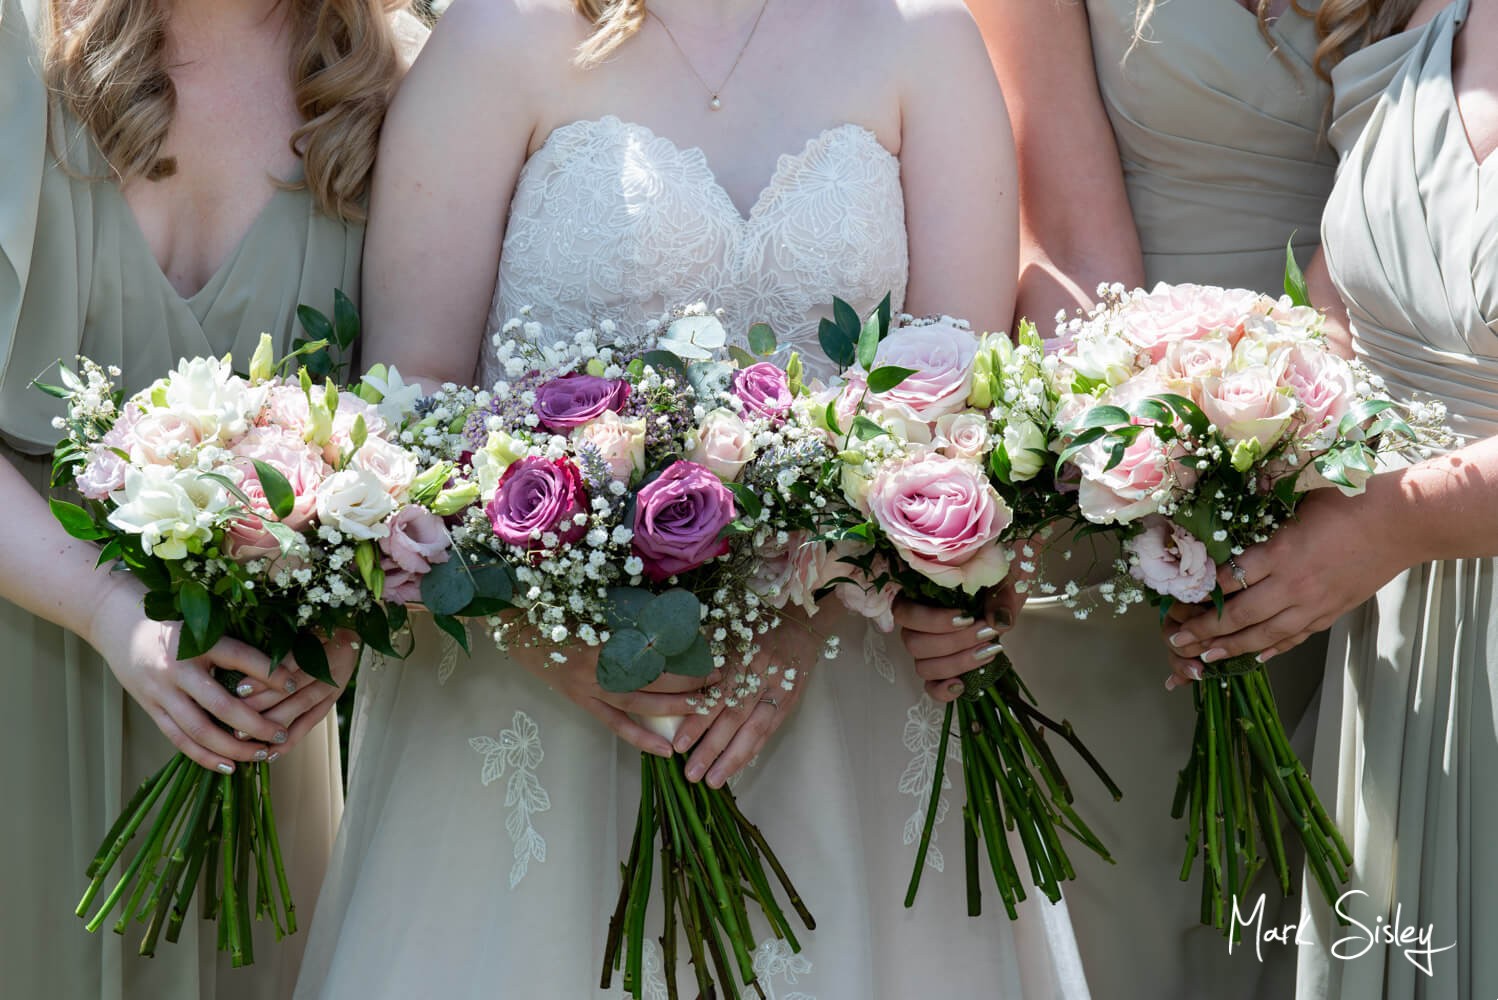
Some of the dramatic lighting techniques I use can result in quite shiny faces, and the inevitable uneven shadowy areas on the arms that you see in the image above. Similar shiny reflections appear on our faces on bright sunny days or when flash lighting techniques are used indoors. You’ll see in the image with standard editing that skin tone areas are darker or paler than is ideal in places, and the white flowers are not displaying the petal detail very well. But all of these issues can be dramatically improved by using manual dodging and burning techniques during an advanced edit. The modified shot below is now much easier on the eye, and the imperfections have been dramatically reduced, this is ideal for enlargements!
Standard Edit
Advanced Edit
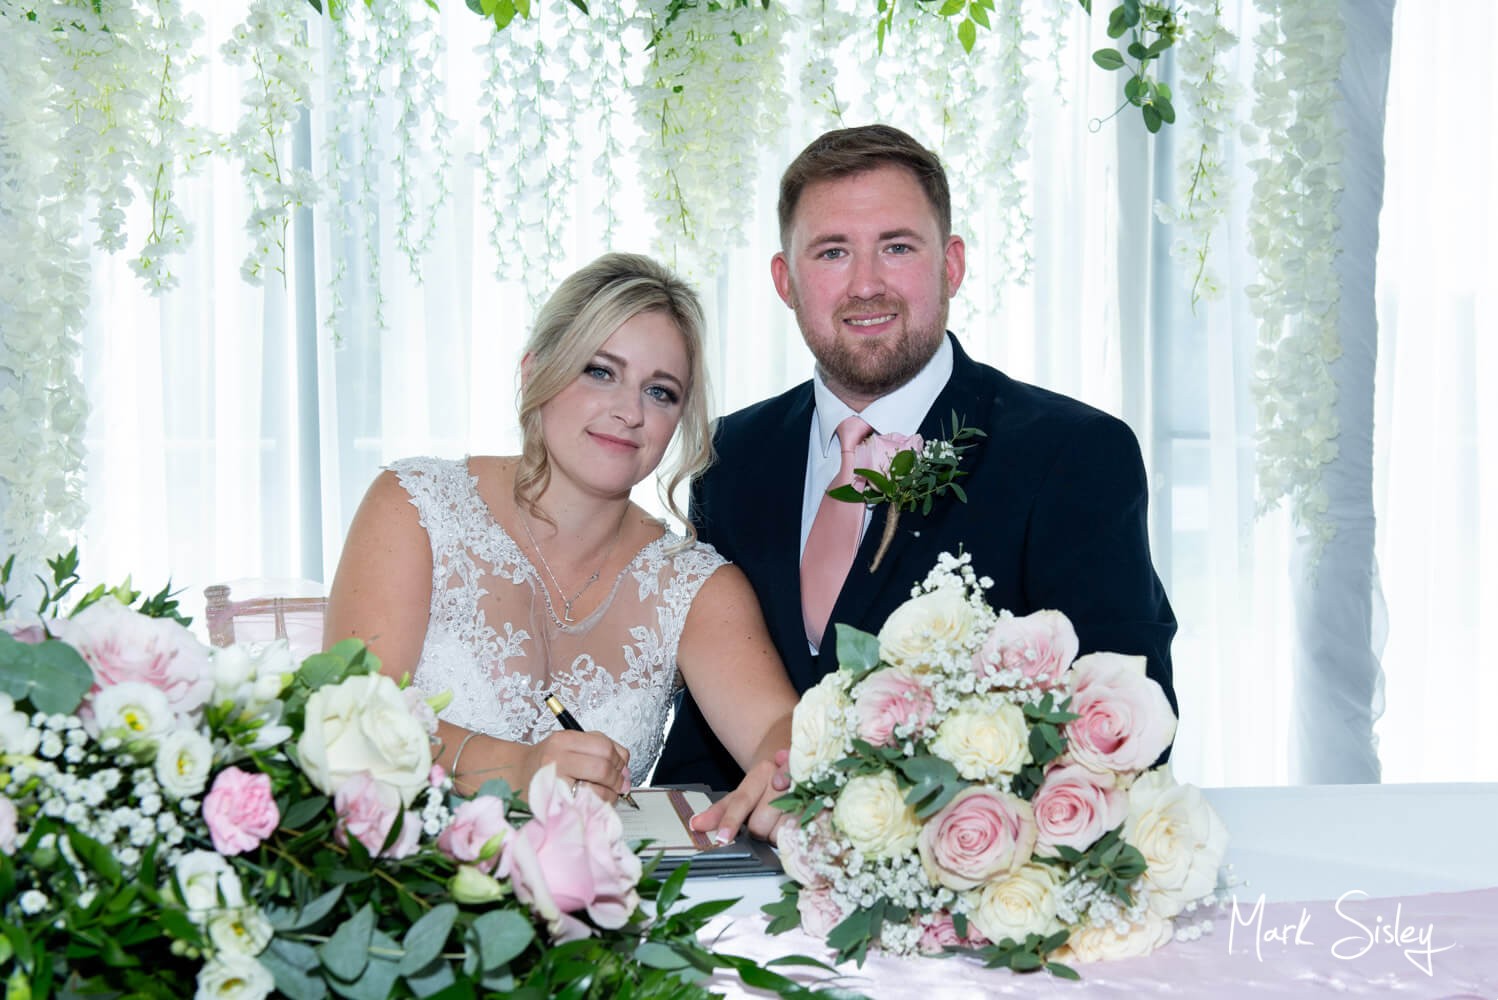
To take the viewer’s eye to the couple I’ve darkened the area around them – then I’ve lightened the bride’s face and added more detail to her arm and hair where it was washed out before.
Standard Edit
Advanced Edit
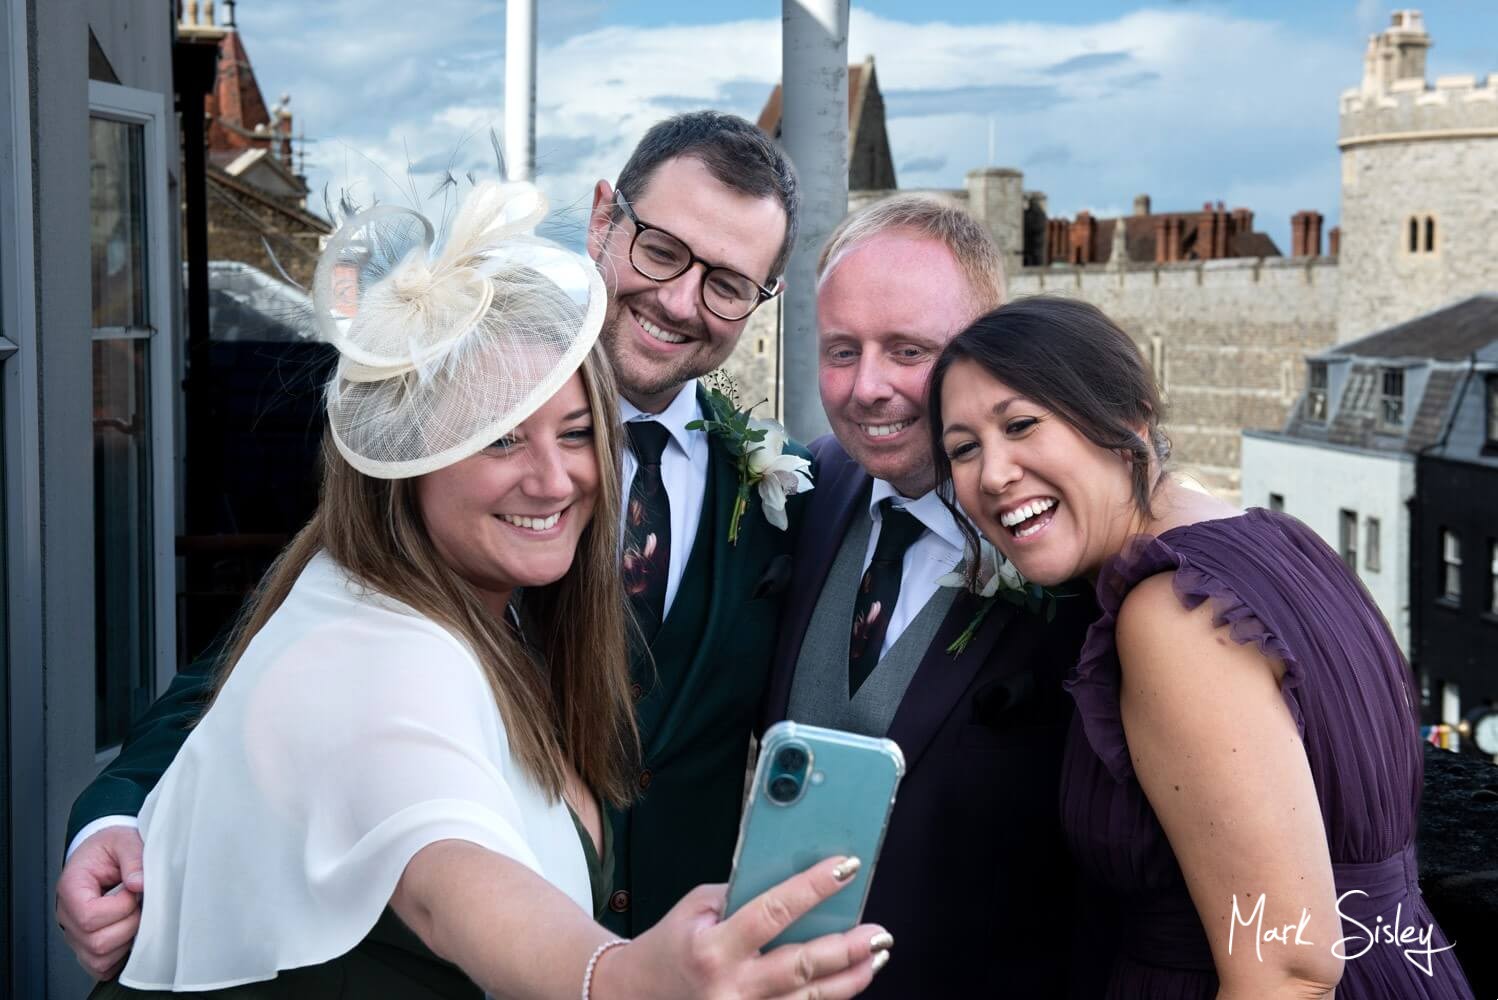
The groom’s face/body and guests on the left have been lightened – then more detail has been added into the washed out areas on the bride’s dress and bouquet
Standard Edit
Advanced Edit
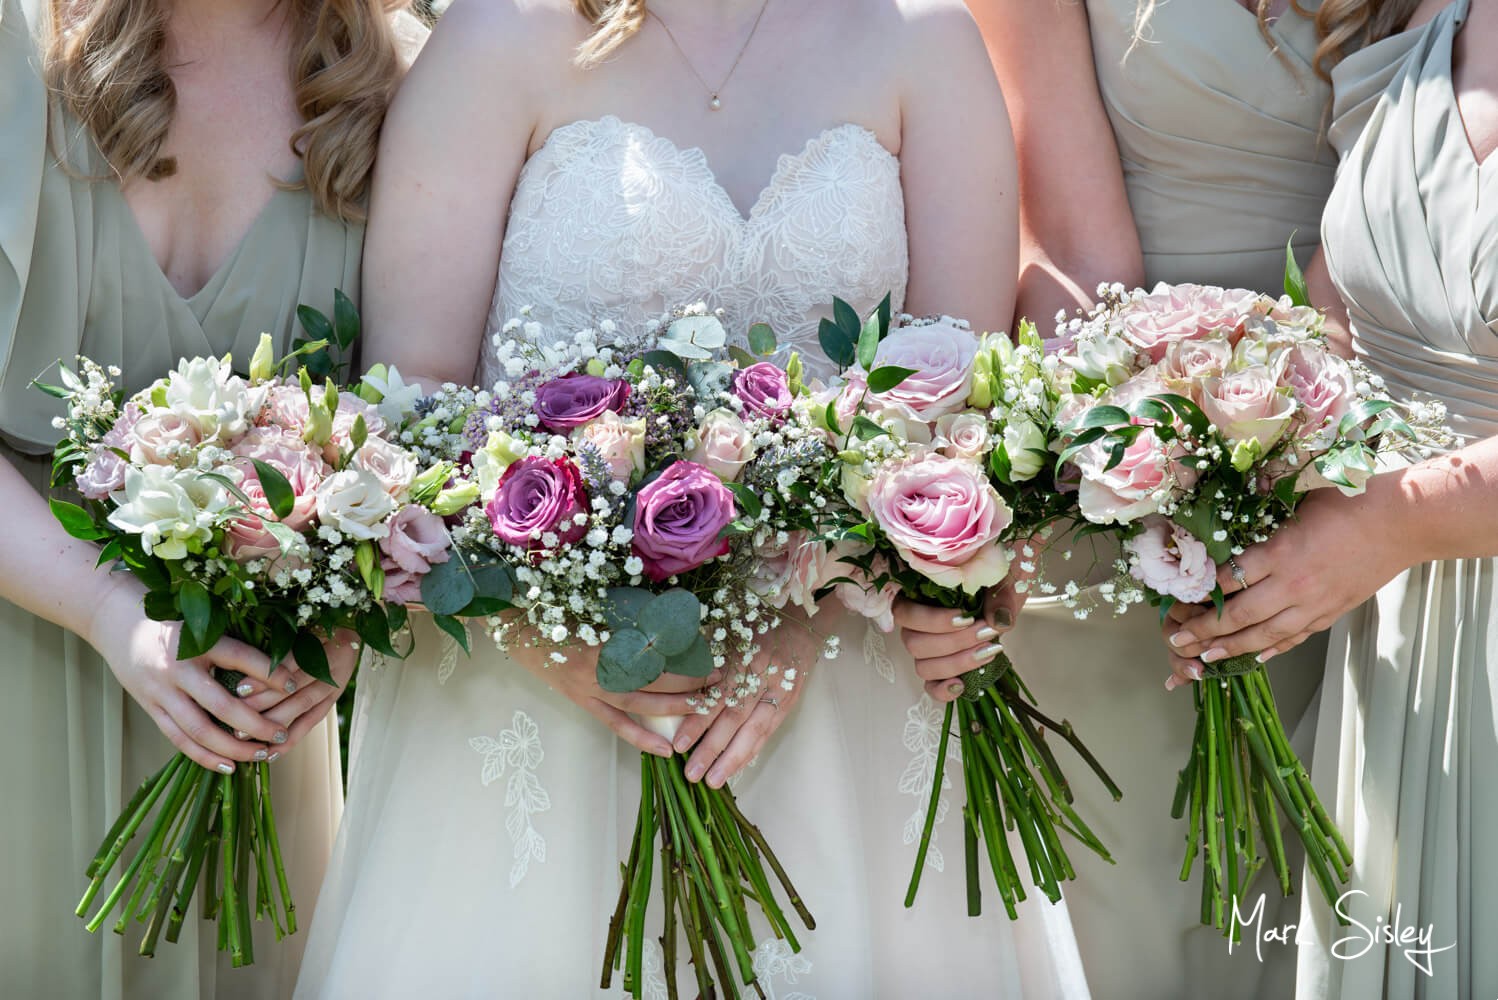
The washed out detail in the bouquets and backdrop has been dramatically improved – then the reflections from the couple’s foreheads have been reduced
Standard Edit

Advanced Edit
For this window lit portrait the area closest to the light on the left has been darkened – then on the right of the image the faces and bodies that were too dark have been lightened.
Standard Edit
Advanced Edit
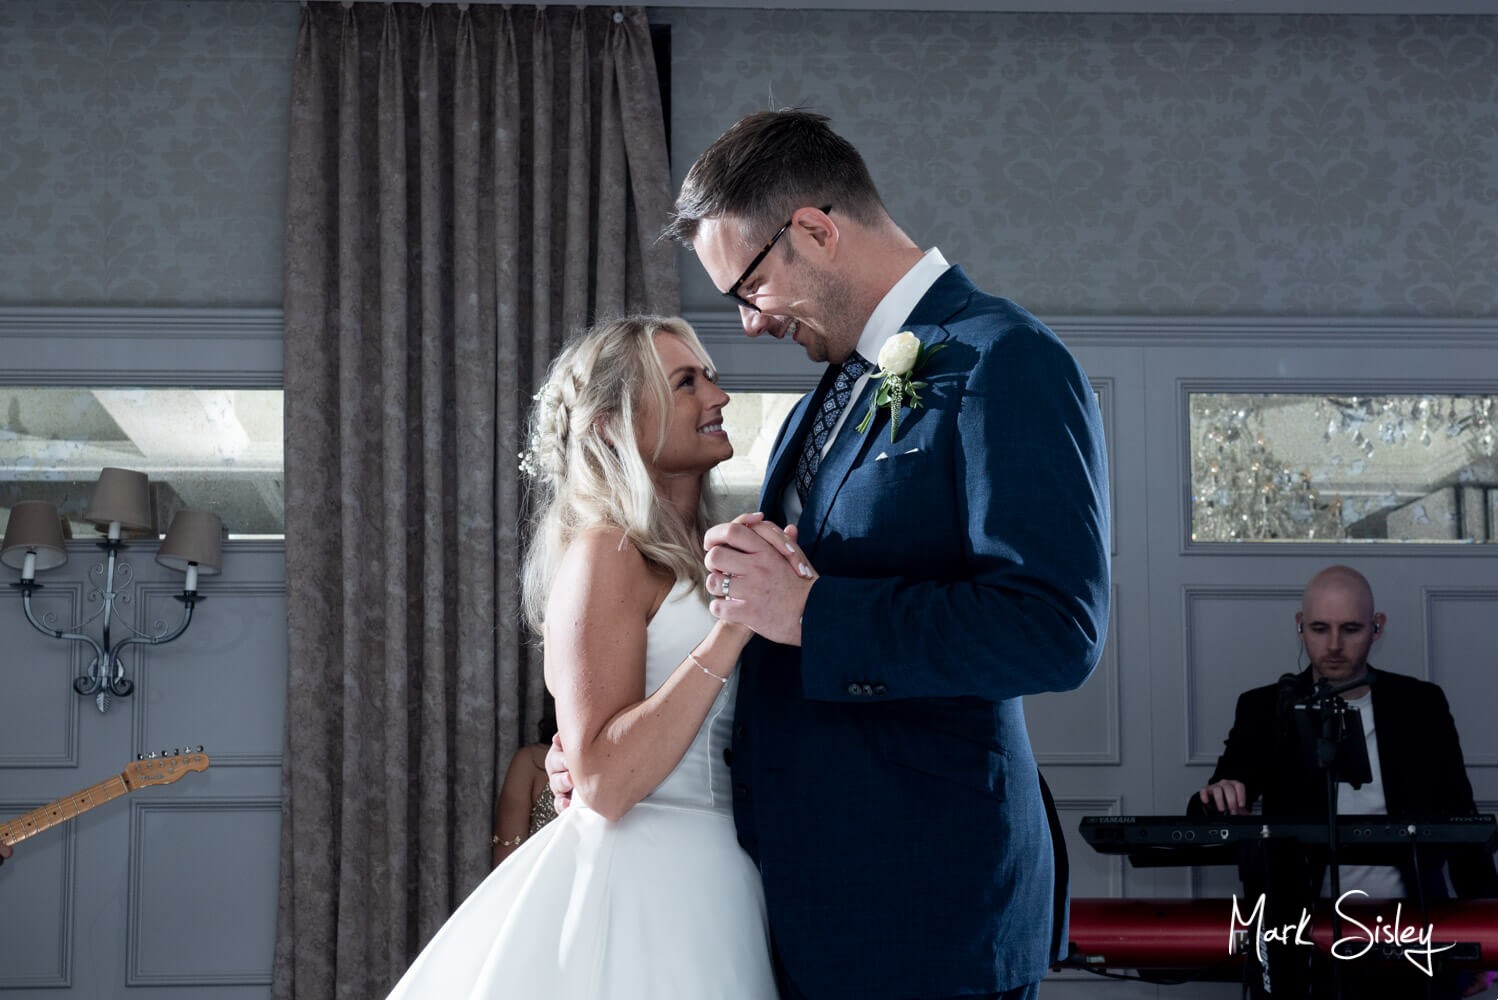
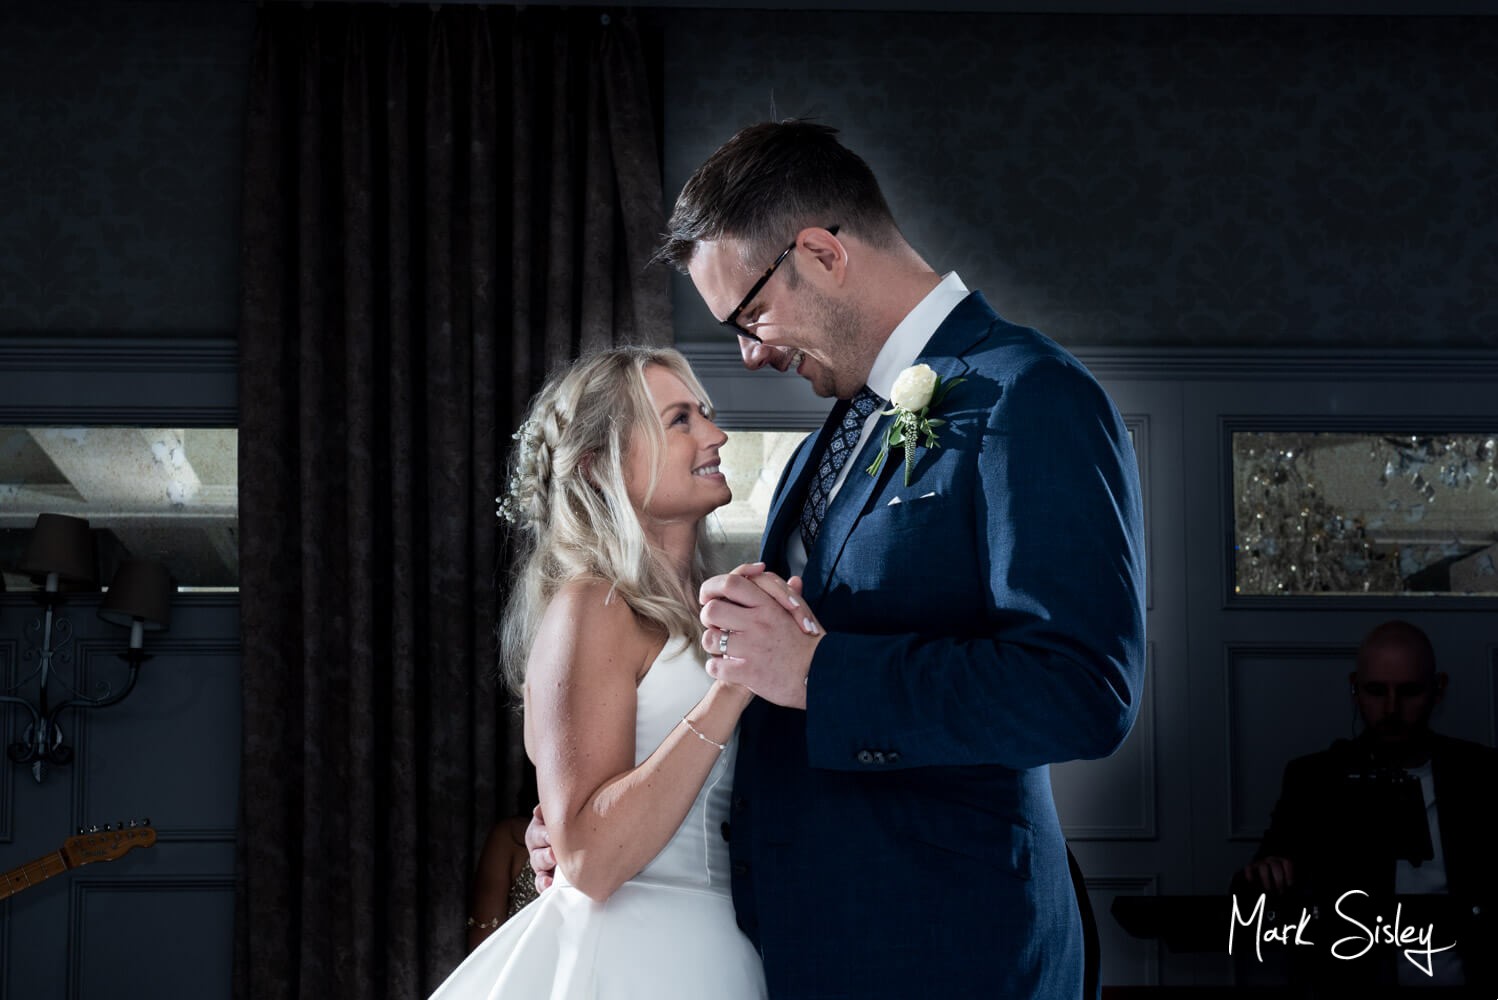
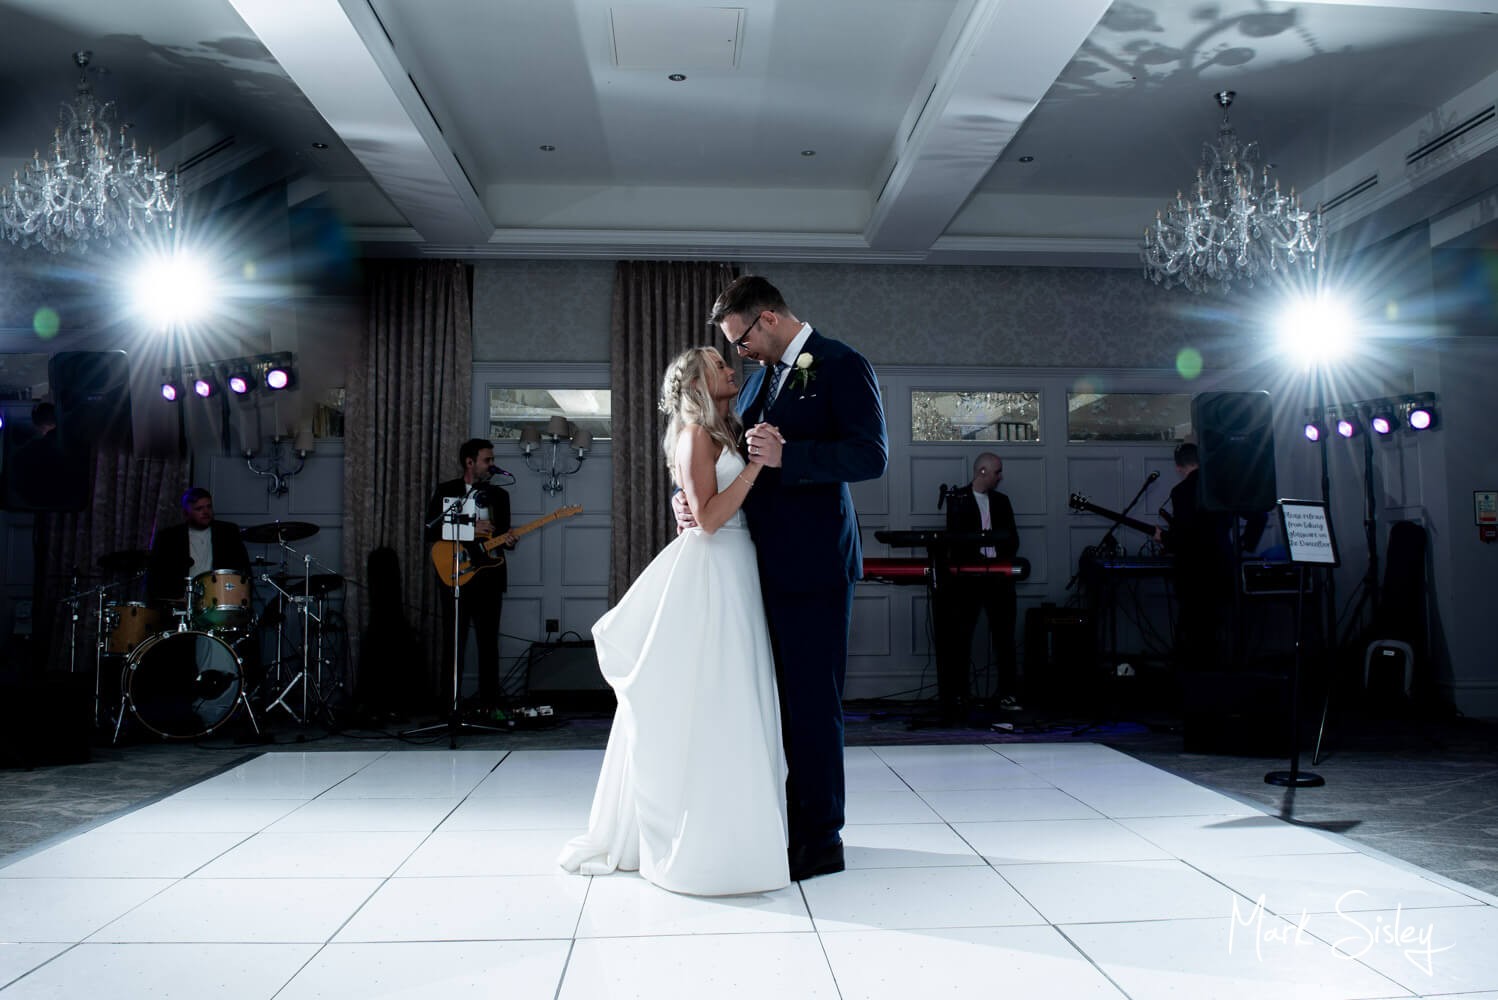
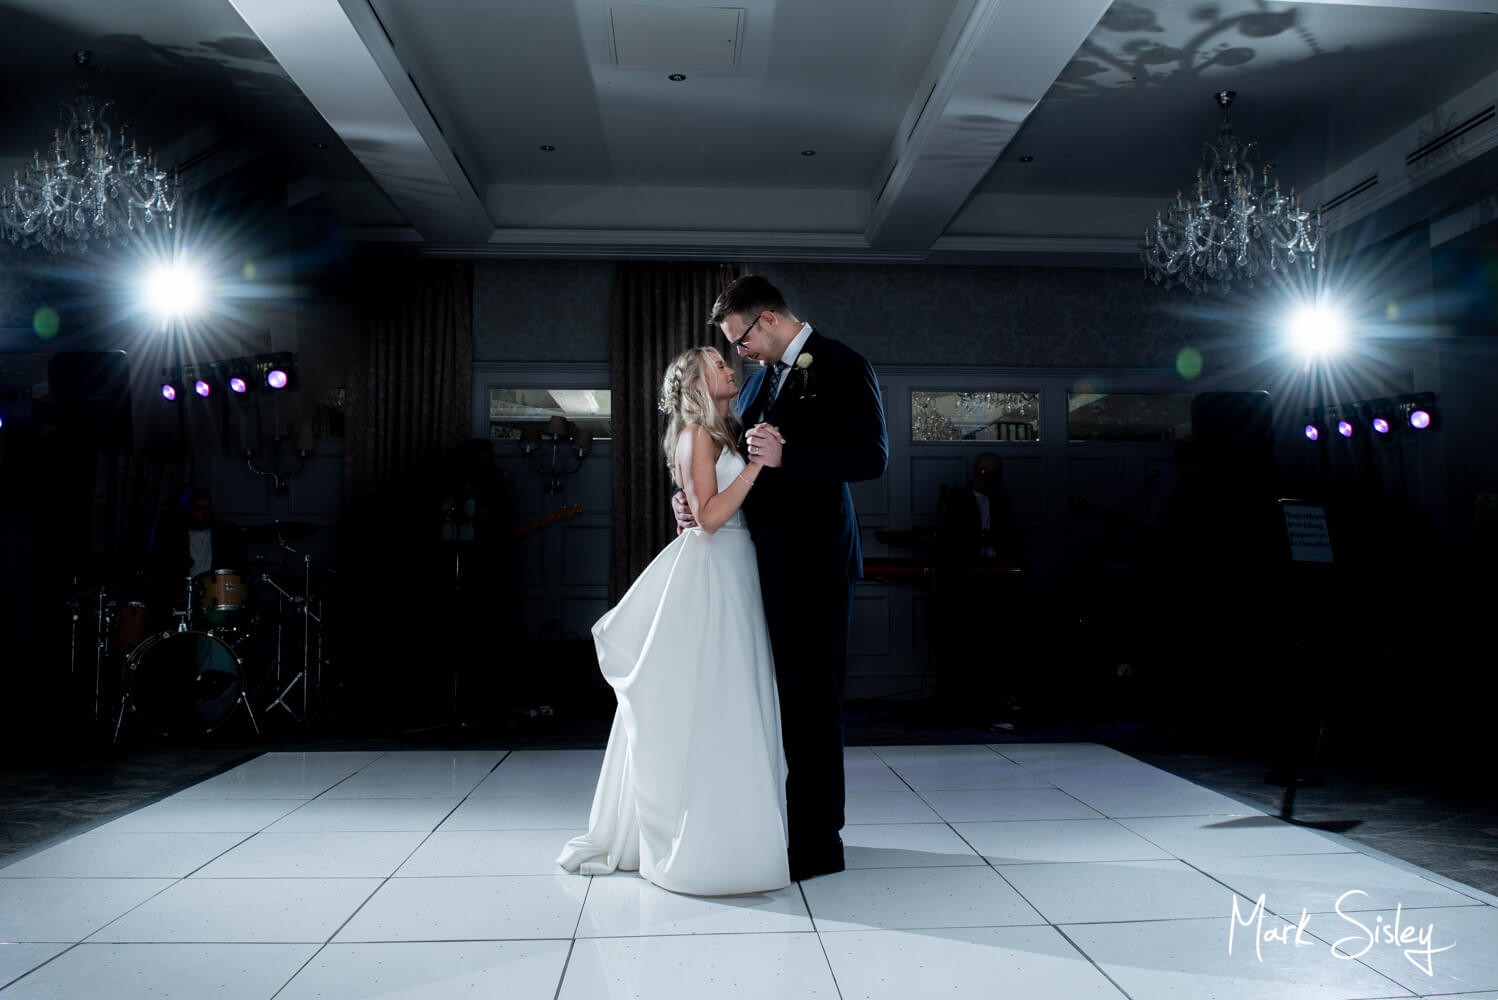
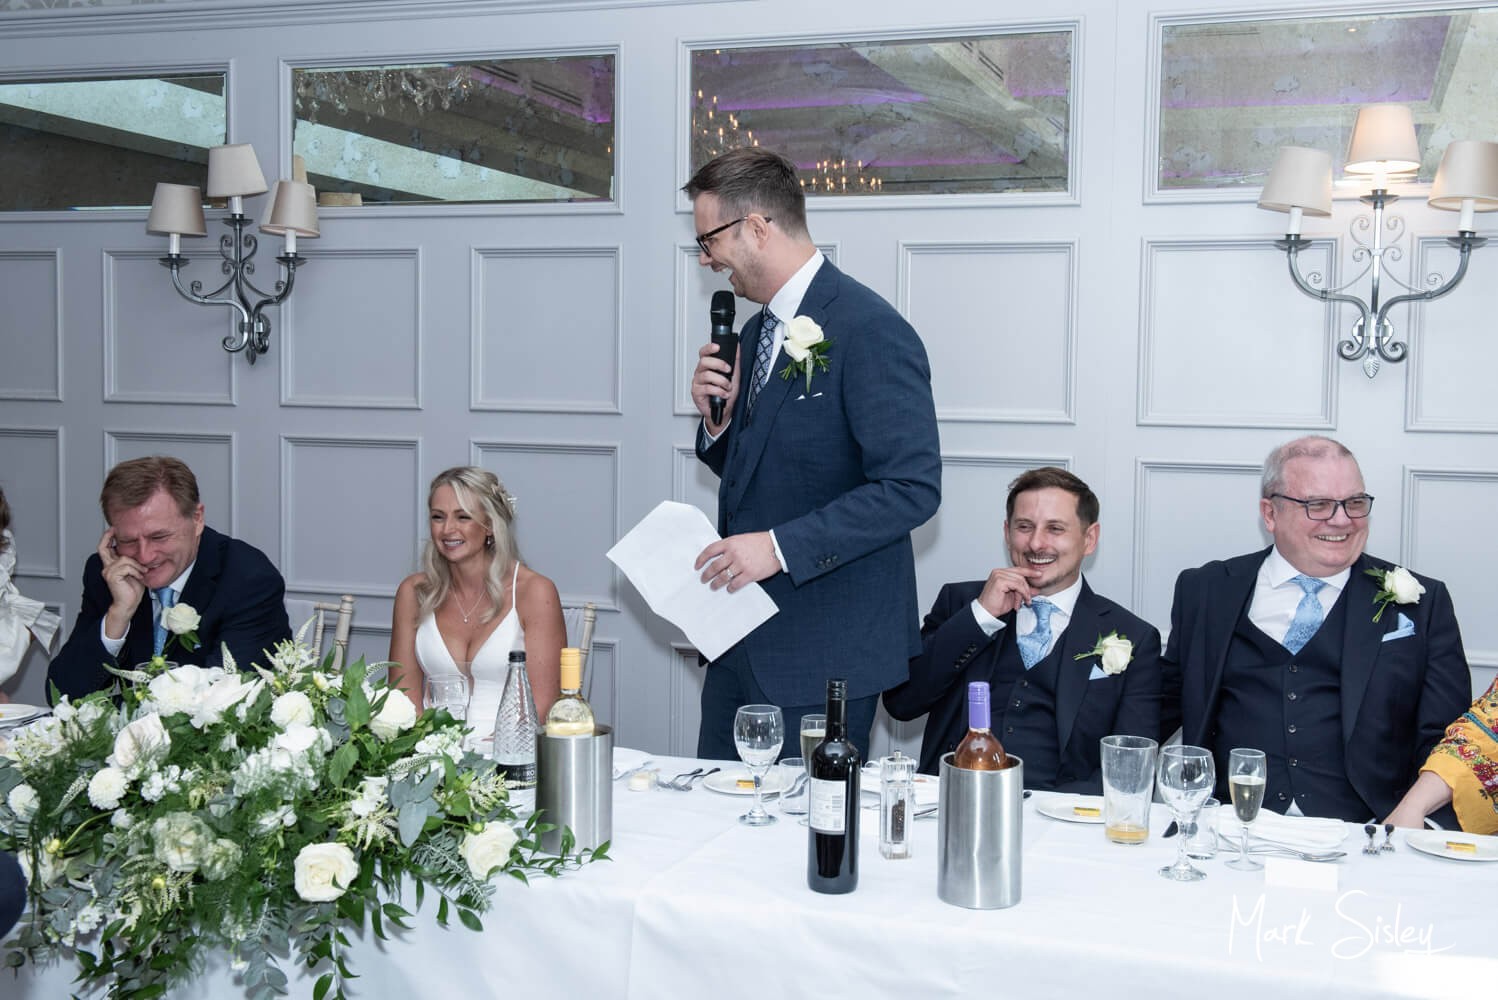
To focus the eye on the couple, I’ve darkened the backdrop to remove the musicians who were not actually performing for the first dance. Also the sign and curtains have been darkened so as not to distract the eye.
Standard Edit
Advanced Edit
As with all flash photography there is always an unevenness to the light – so you’ll see I’ve lightened the two faces on the left, then you’ll notice I’ve added more detail into the table flowers and the white table cloth.
Standard Edit
Advanced Edit
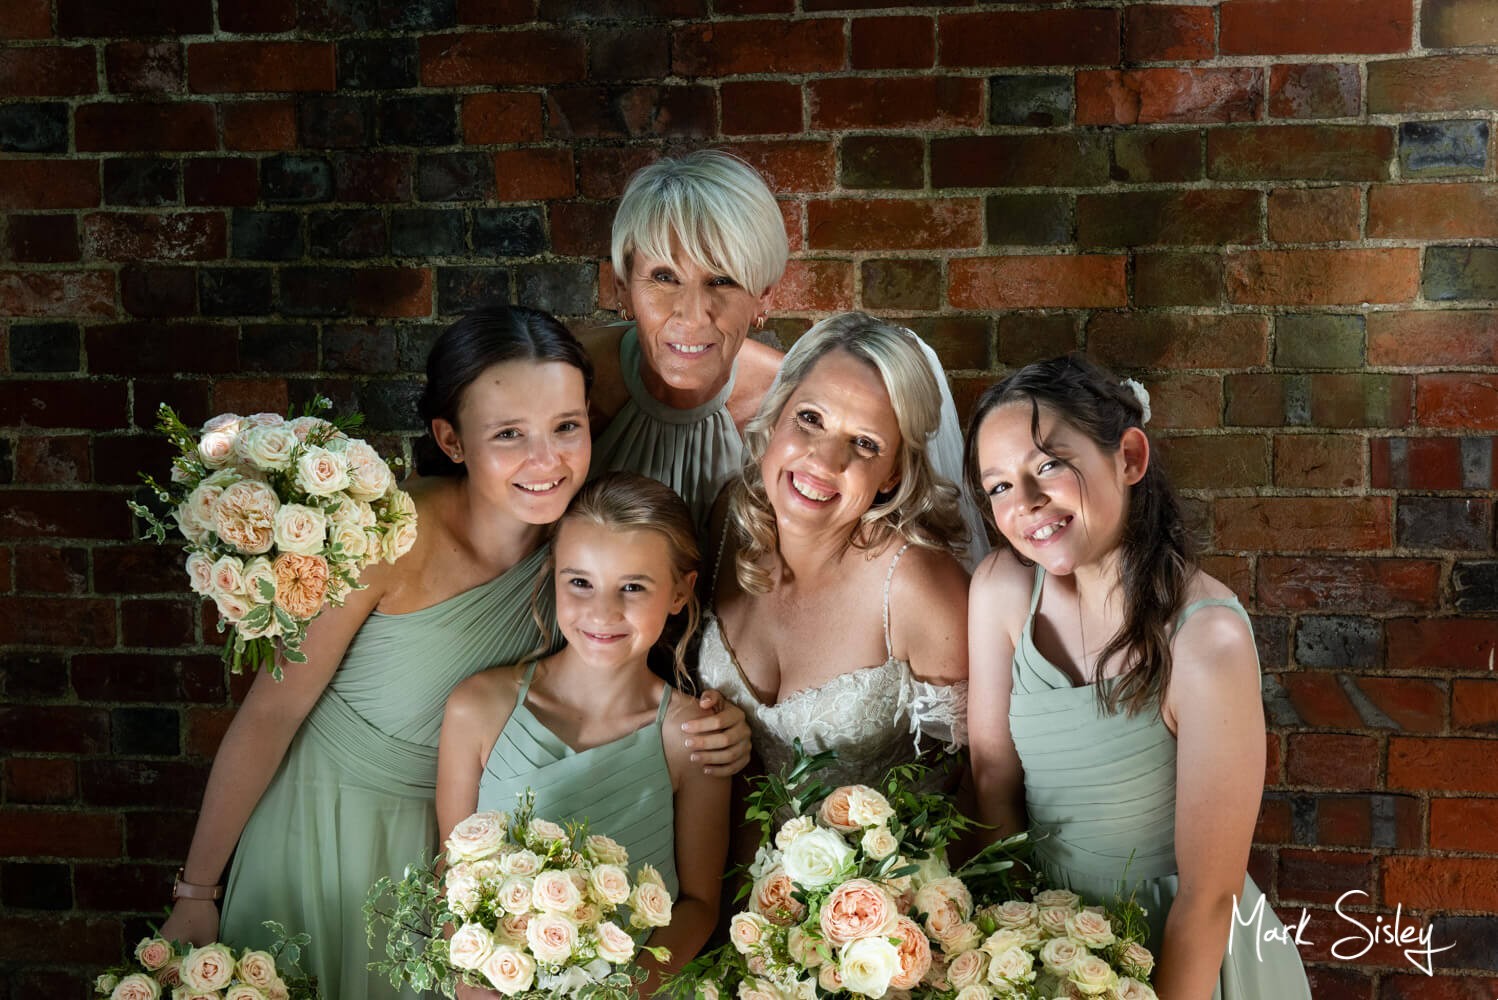
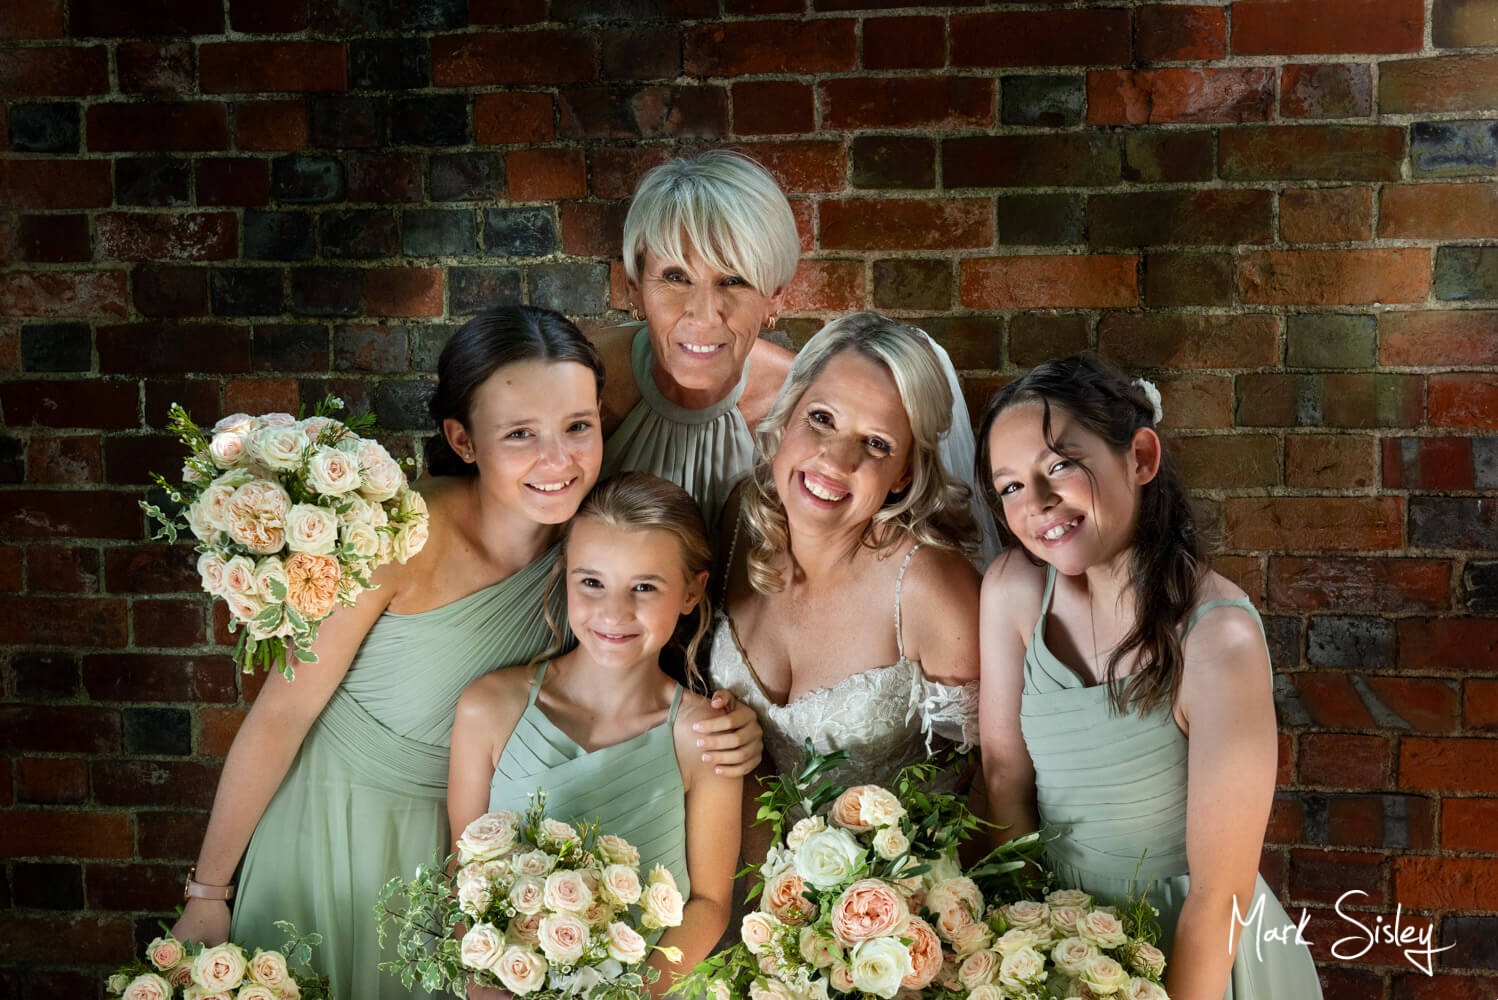
There is always an unevenness to skin tones when you have someone with darker skin besides someone with paler skin. In this instance I’ve darkened the lady on the left and brightened the lady on the right.

Standard Edit
Advanced Edit
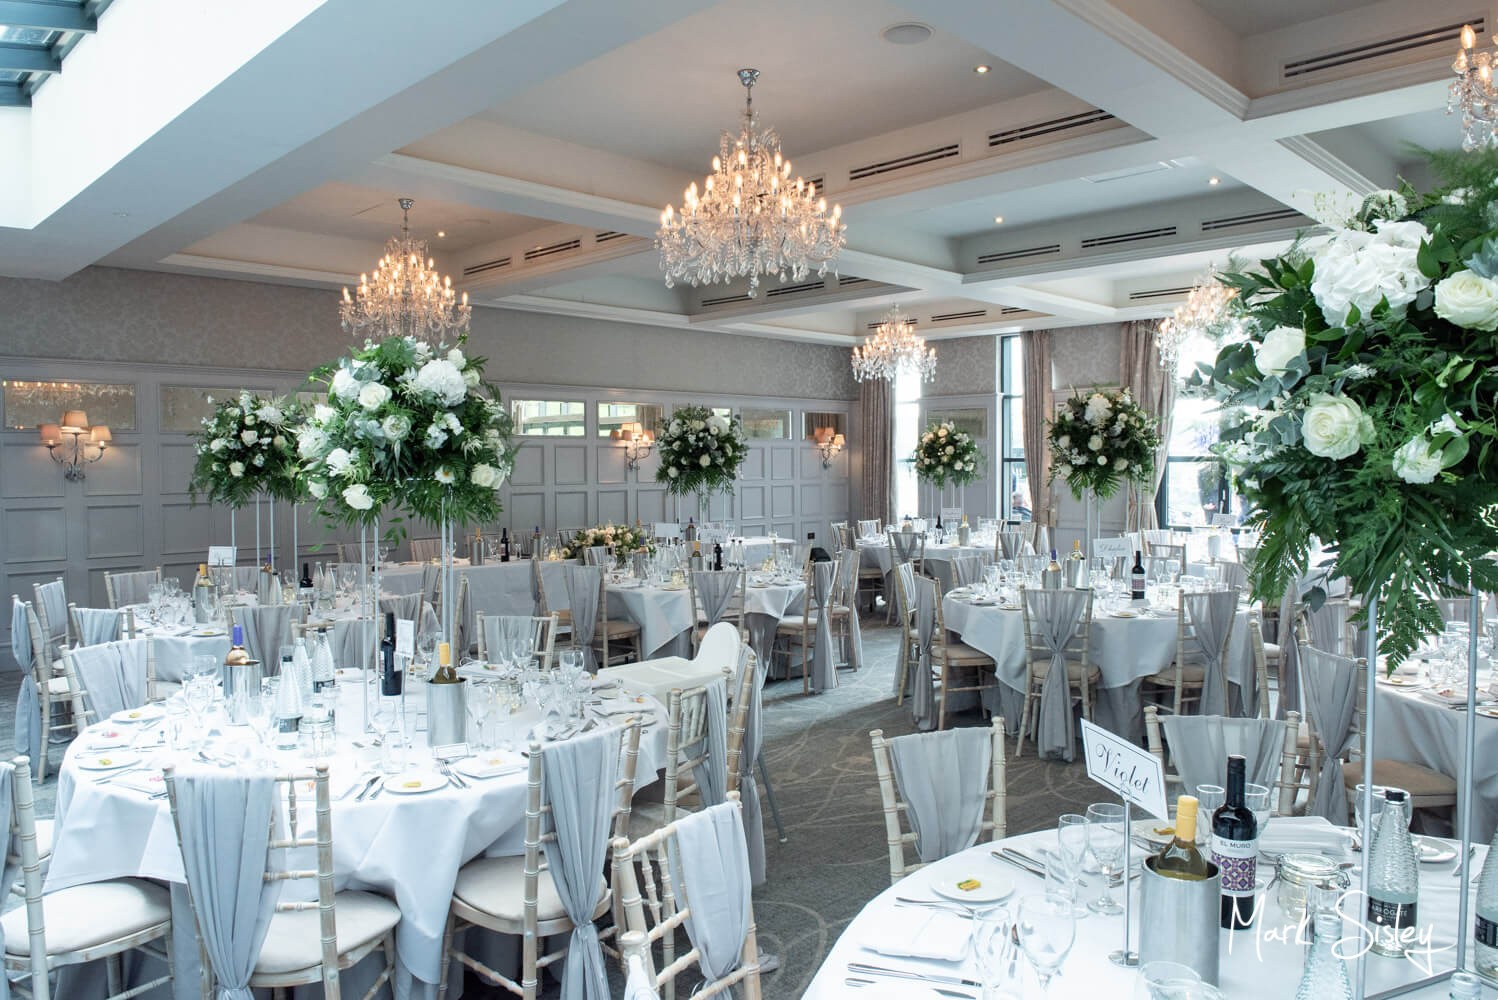
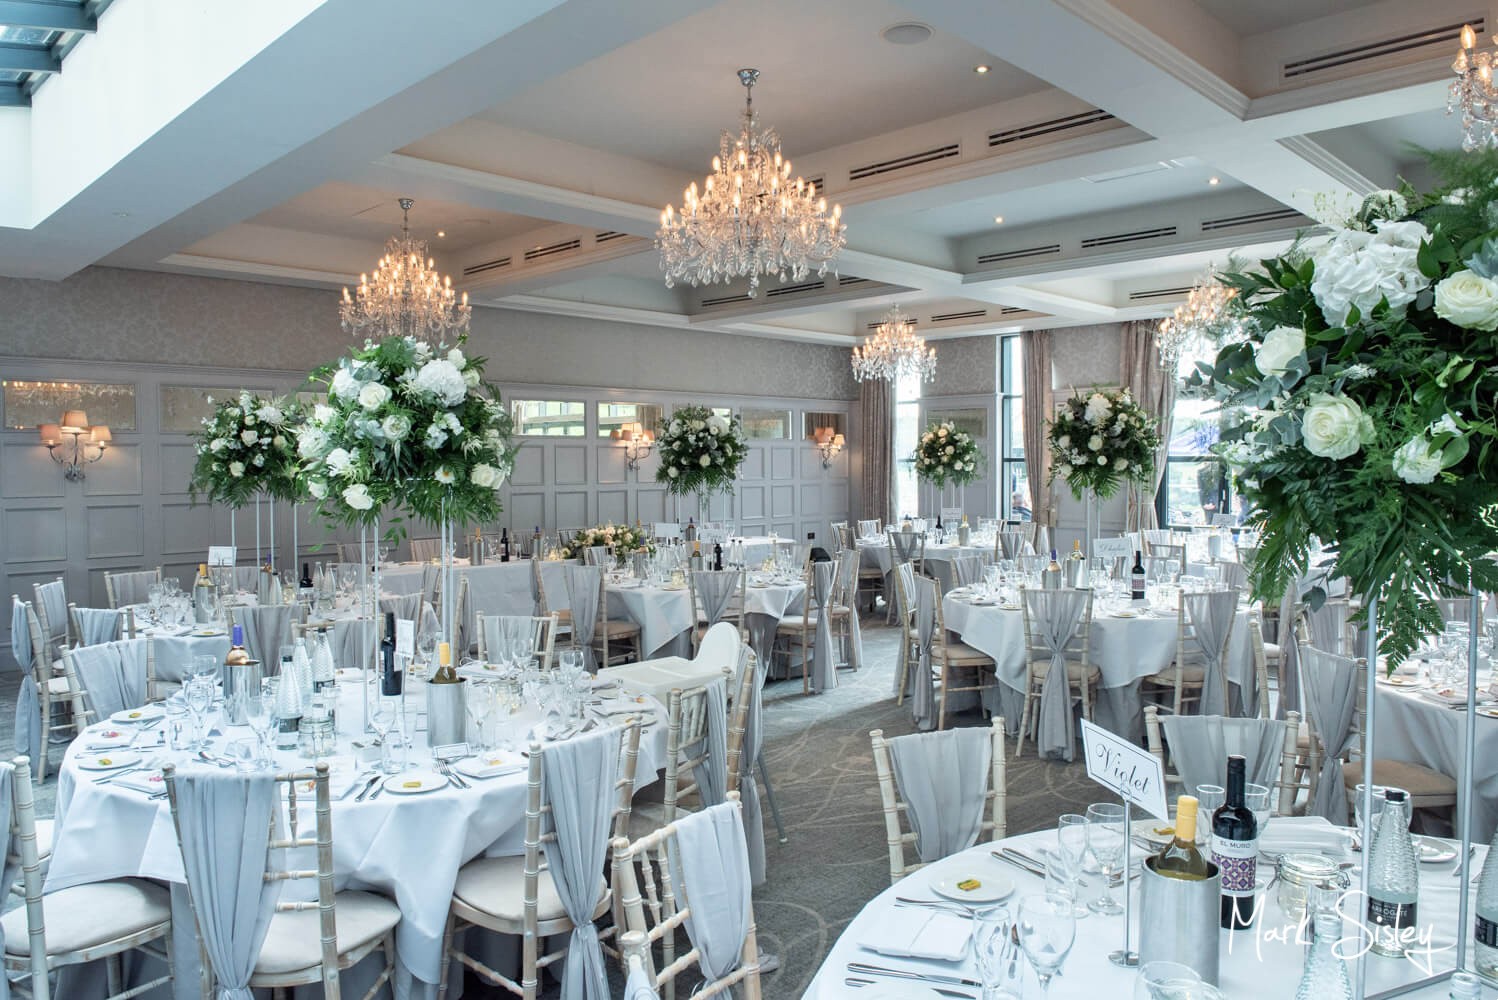
This interior was captured with natural daylight, with room shots the lighting is rarely very even. You’ll notice on the standard edit above that the bright skylight illuminating the two tables closest to the camera is washing out the detail in the two tables, this has now been dramatically improved on the advanced edit below.
Standard Edit
Advanced Edit
Flash lighting once again is always very uneven when I’m working indoors, the people closest to the light source will always be much paler, and those in the distance will be much darker. But after a little bit of manual dodging and burning in Adobe Lightroom, anything is possible to even out these issues to produce a much brighter more detailed image.
Standard Edit
Advanced Edit
On the standard edit above you’ll notice the unevenness of the outdoor lighting for this bouquet shot. The ladies dresses and skin tones appear a little shadowy in places, whilst the paler flowers are struggling to hold any detail. But employing the dodging and burning tools during the my advanced editing process I can dramatically improve the definition throughout the picture.
Standard Edit
Advanced Edit
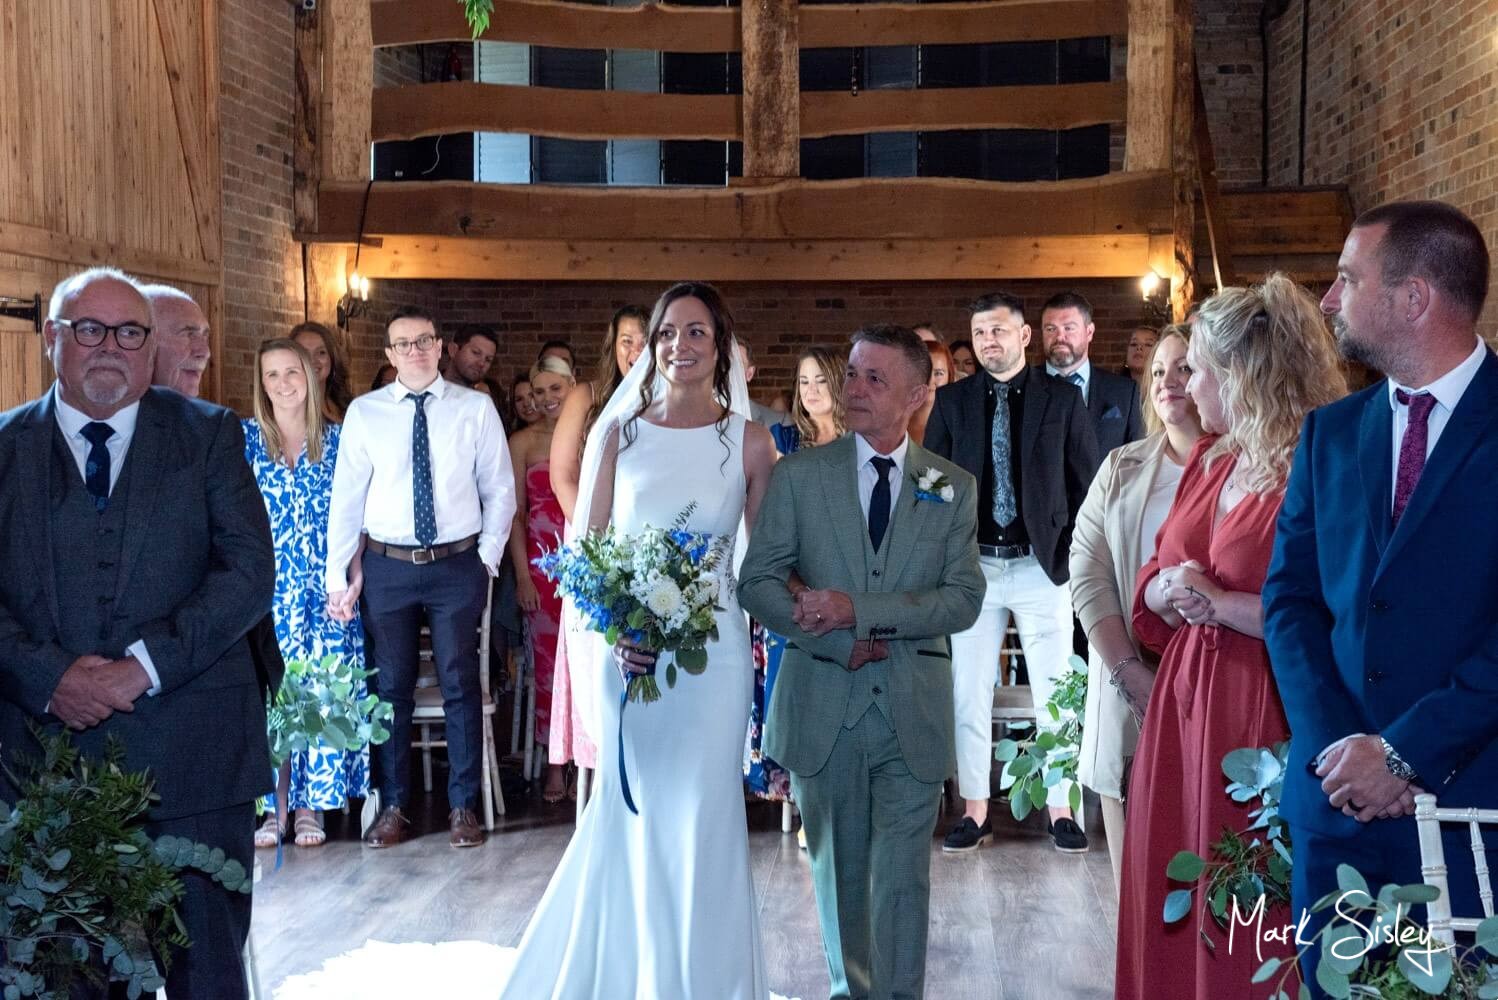
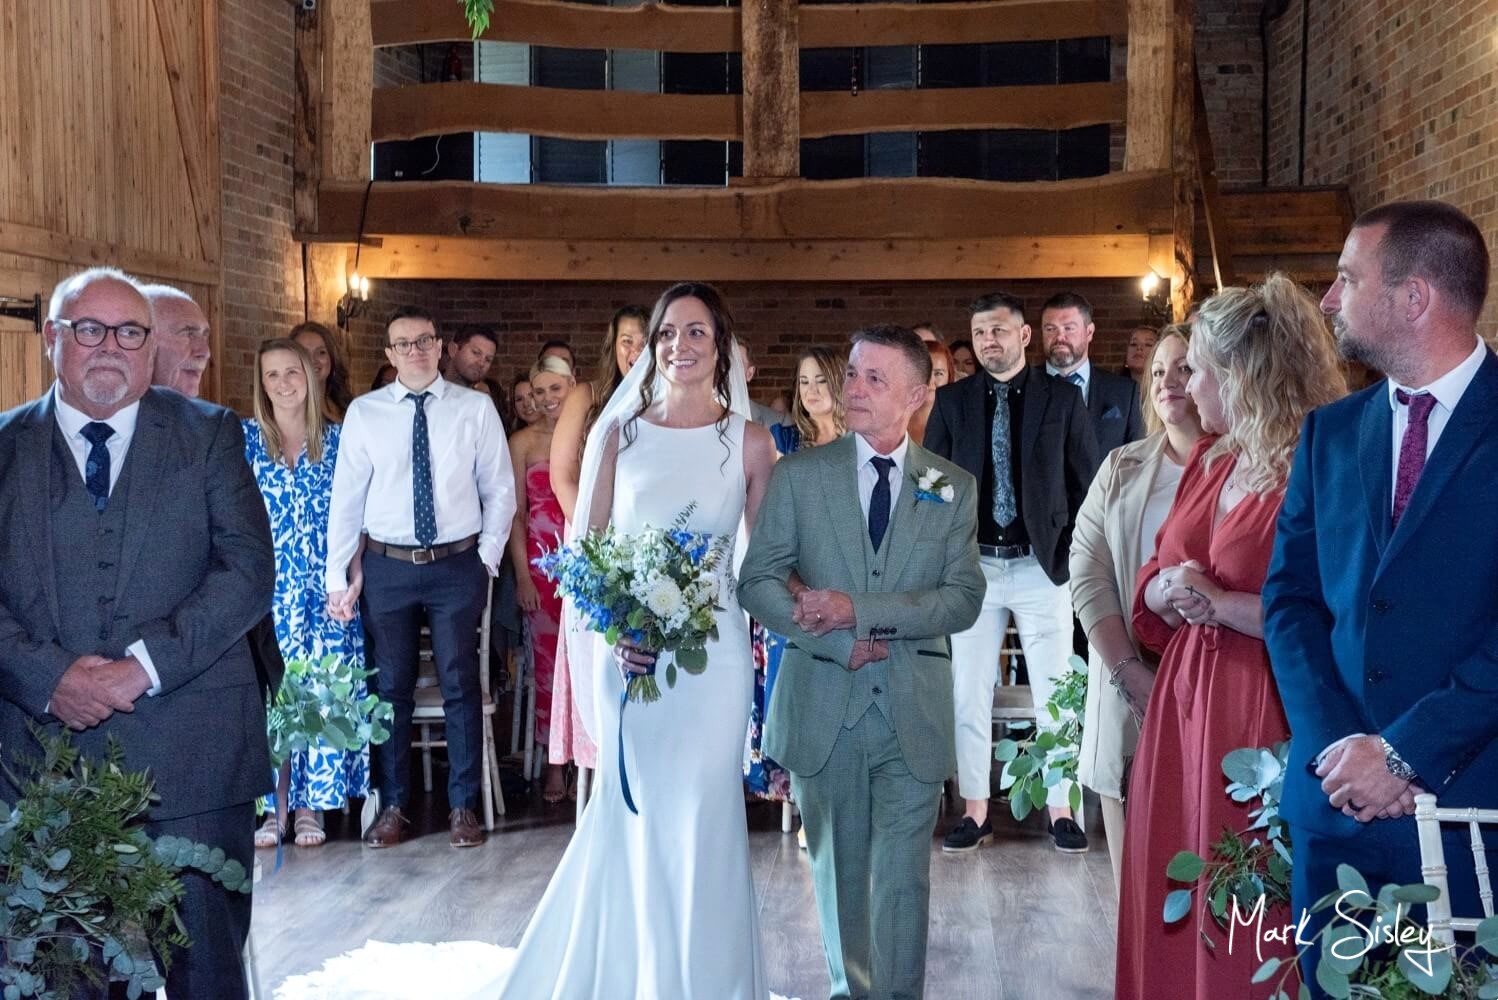
On the standard edit above you’ll notice the unevenness of the indoor lighting coming through the large barn door. Many of the faces appear too pale or dark in places, whilst dad’s suit is fairly dark. But employing the dodging and burning tools during the my advanced editing process I can dramatically improve the definition detail and skin tones throughout the picture. Now the lighting appears a lot more even throughout the image.
Standard Edit
Advanced Edit
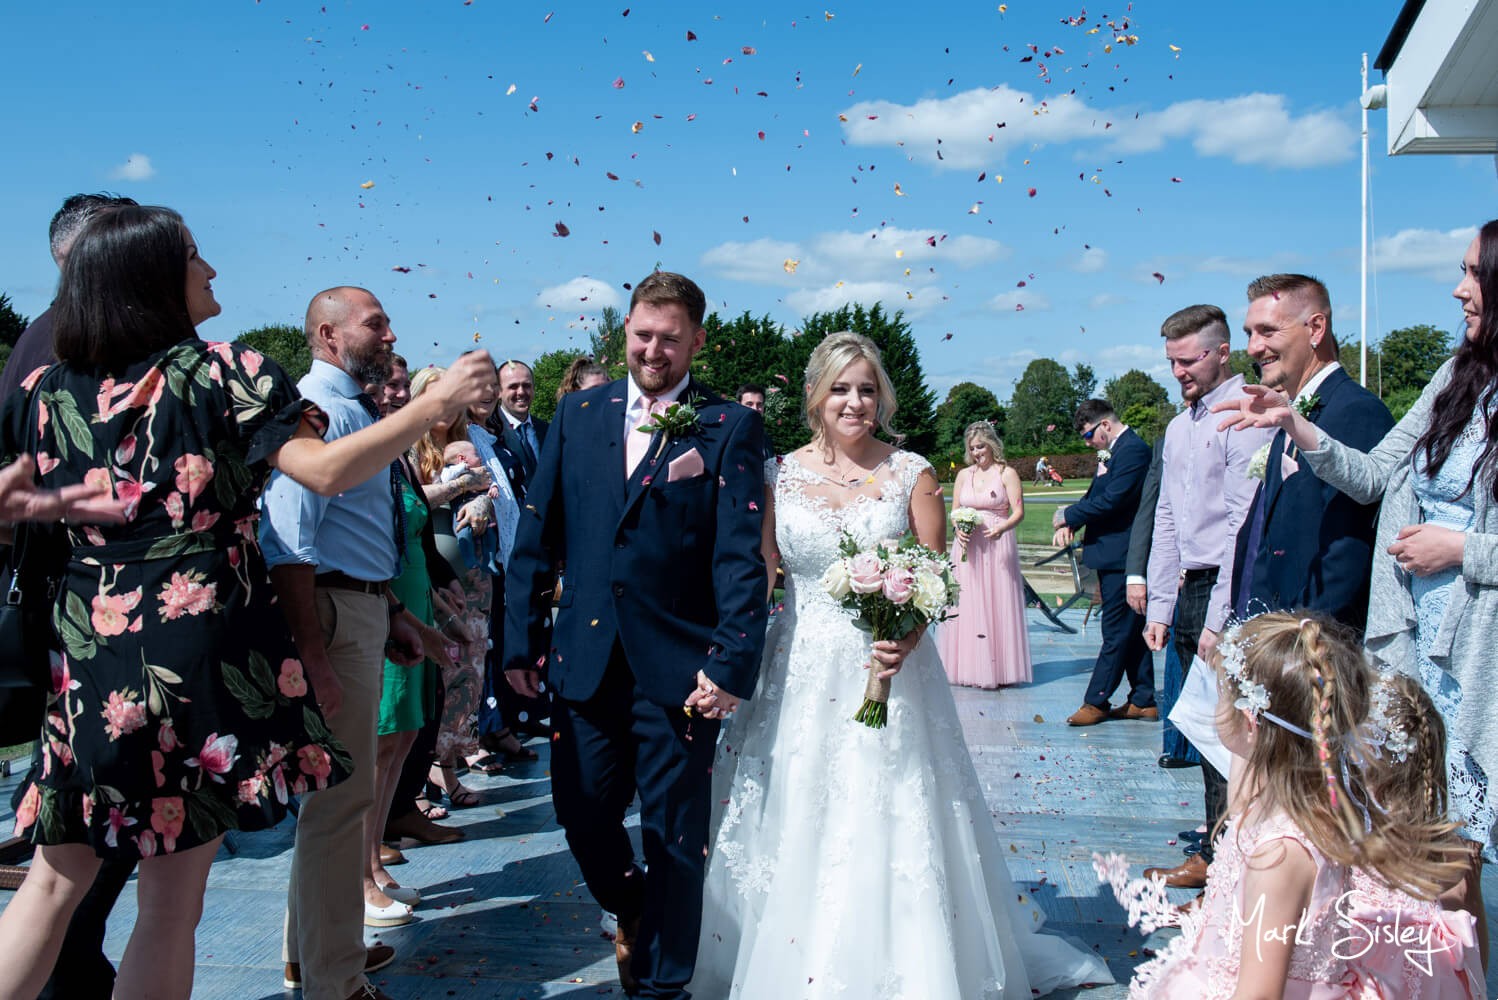
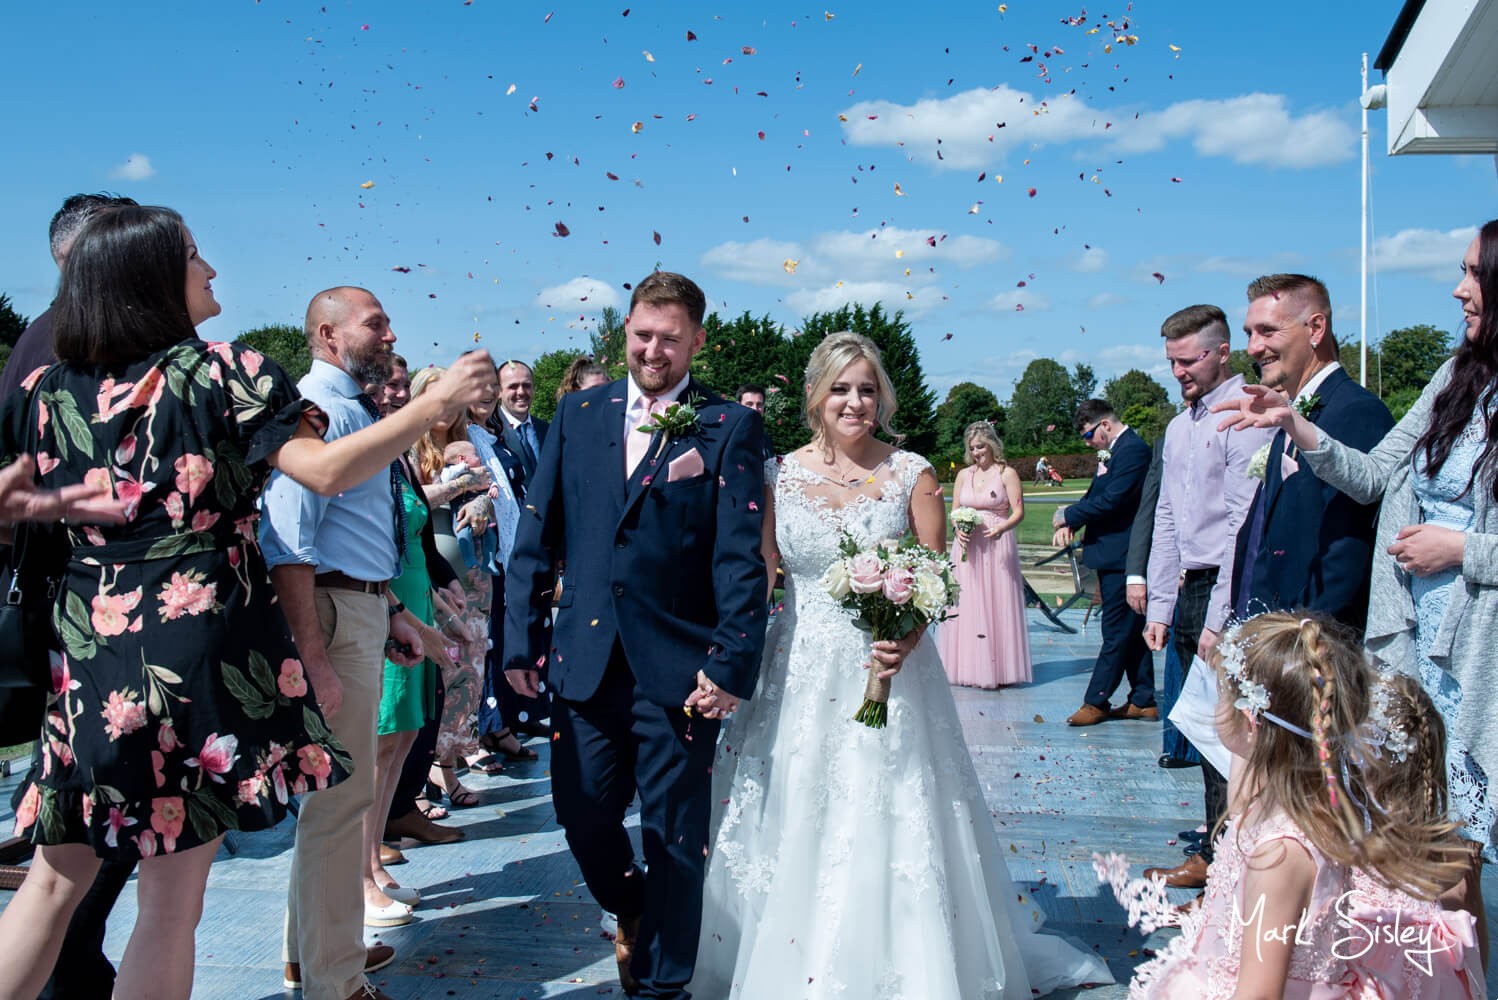
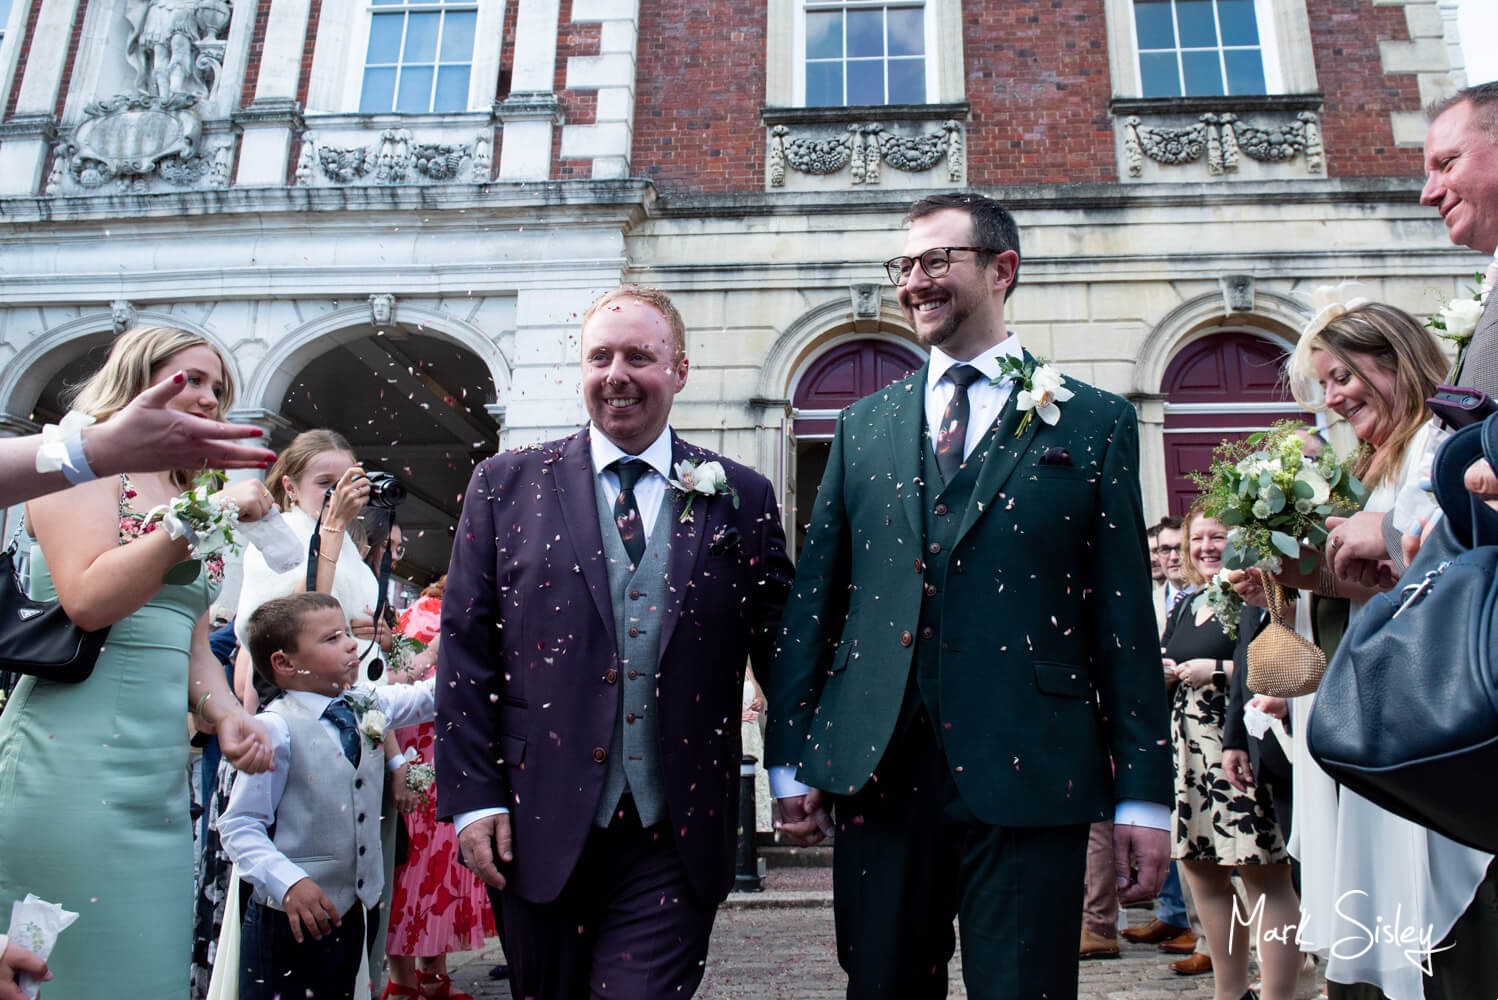
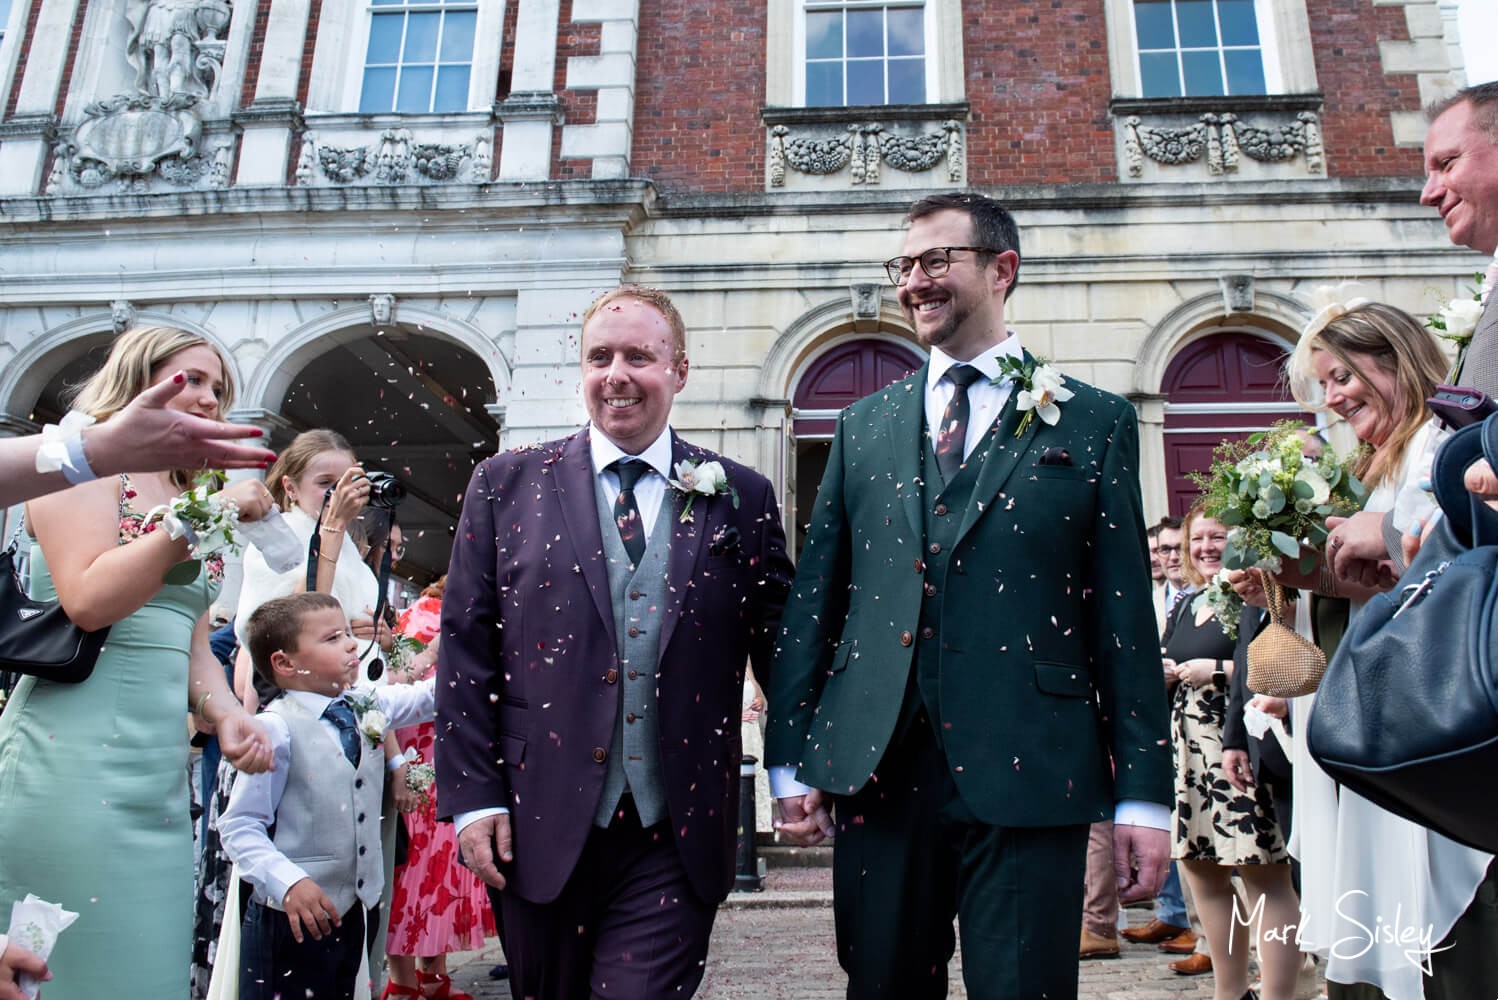
On the standard edit above you’ll notice the unevenness of the outdoor lighting for this confetti aisle shot. The skin tones of the couple and the guests appear a little shadowy in places, you’ll also notice the grooms foreheads are very pale, and the guests outfits and cobblestones are dark. But employing the dodging and burning tools during the my advanced editing process I can dramatically improve the skin tones, definition and brightness throughout the picture.
Standard Edit
Advanced Edit
On the standard edit above you’ll notice how the backdrop can totally wash out on a very bright sunny day, this is often the case when the subjects have been positioned in the shade to avoid the harsh sunlight. Yet there’s so much detail in background that I’d love to include! By employing dodging and burning masking tools during the my advanced editing process I can dramatically improve the backdrop definition.